So no pictures in this post...
I've been doing quite a bit of pottery but that means all the work is outside of my apt and messy so I'm less likely to take pictures and post things.
I have made a ton of things which I will work on cataloging in the next few weeks. Most of it is a mix between Christmas and birthday presents for friends and family.
I have also made several sets of crib sheets for friends who have had kids in the past year. I ended up buying a ton of elastic online for something around $30 shipped which means that for each crib sheet the average cost is around $5-$8 for the cost of fabric and thread and elastic.
I also made a blanket for the most recent friend's baby and hopefully I can find photos of that. It took quite a bit of work to be done before she was born ( I made it by around 3 weeks!)
Tuesday, April 29, 2014

Saturday, April 13, 2013
pottery all over the place! (pic heavy)
This will be a short picture heavy post. What have I been doing lately? well some of it is what I should be doing (work) the other part is pottery in the pottery studio so there are very few pictures of me crafting anything but I figure I can share the end results most worked well some not so much but here it is!
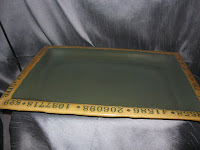


This is my Schroder platter I had for my presentation. I used the wooden mold to drop in the clay this took over 6lbs of clay rolled out in a slab to cover it, anything larger than this won't fit in the kiln ... which is good to know I eyeballed the size fairly well. I glazed this with the help of a friend at the studio because I couldn't hold it and glaze at the same time. I then scrapped off the green glaze from the border and sprayed yellow on over it. I really love the way it turned out!


This piece is the middle size of my three four sided molds, I was experimenting and absolutely love how this came out. I will have to use these colors more often. I again used the technique of rubbing off glaze around the rim. I need to experiment with glazing the bottoms of pieces since I don't want too much (and have it get stuck to the shelf) or too little glaze which is what happened on the bottom here.


This is the smallest of the four sided. I dropped it to create the curve but I like how it didn't become very deep and create a bowl more than a plate. I am experimenting with ways to attach feet to hand built pieces. I used one of the new recycled glazes for this one and really liked how it came out, I also used underglaze to paint what I was hoping would look like bamboo... not quite but I'll keep trying to get better!


This is my Catalan plate, I used the same technique as the mid sized four sided piece but because this is much larger it didn't give quite the same effect. I'll have to play with it although I do like the colors the numbers don't pop as well here. I also now know I do not like the blue slip under this, which is what the black dots are. I also ended up cutting the bottom out of this originally so it gave it an interesting shape where I re-attached it. All in all a success.


This is the smallest of the six sided shapes. The idea I had here was of water pooling into the center, I really liked this although I think next time I will use quite a bit more glaze in the center to make it more pool like. Although I have no idea how this will turn out on white clay which is what I have quite a bit of at the moment.


This is the medium six sided shape, the lines in the center came from folds in the newspaper I used to hold the clay before placing it in the mold, I think it's interesting how it turned out. I was going for a jeweled look with this one so there is blue slip along the edges which give it a nice texture.


Again the smallest of the six sided shapes. I used blue slip dropped in the middle, the red on the outside I thought I had put quite a bit of it but some how it wasn't nearly enough, I probably should have re-glazed this adding more red since I don't dislike the combination just the amount makes it look like a mistake.


I dipped this in green celedon however the glaze has massive amounts of crawling, I happen to really like the color where it's extremely heavy so I may have to use that in the center of something where it can't fall off, but it's no good to apply it heavy to any side because gravity will take over.


This is my Schroder platter I had for my presentation. I used the wooden mold to drop in the clay this took over 6lbs of clay rolled out in a slab to cover it, anything larger than this won't fit in the kiln ... which is good to know I eyeballed the size fairly well. I glazed this with the help of a friend at the studio because I couldn't hold it and glaze at the same time. I then scrapped off the green glaze from the border and sprayed yellow on over it. I really love the way it turned out!


This piece is the middle size of my three four sided molds, I was experimenting and absolutely love how this came out. I will have to use these colors more often. I again used the technique of rubbing off glaze around the rim. I need to experiment with glazing the bottoms of pieces since I don't want too much (and have it get stuck to the shelf) or too little glaze which is what happened on the bottom here.


This is the smallest of the four sided. I dropped it to create the curve but I like how it didn't become very deep and create a bowl more than a plate. I am experimenting with ways to attach feet to hand built pieces. I used one of the new recycled glazes for this one and really liked how it came out, I also used underglaze to paint what I was hoping would look like bamboo... not quite but I'll keep trying to get better!


This is the medium six sided shape, the lines in the center came from folds in the newspaper I used to hold the clay before placing it in the mold, I think it's interesting how it turned out. I was going for a jeweled look with this one so there is blue slip along the edges which give it a nice texture.


Again the smallest of the six sided shapes. I used blue slip dropped in the middle, the red on the outside I thought I had put quite a bit of it but some how it wasn't nearly enough, I probably should have re-glazed this adding more red since I don't dislike the combination just the amount makes it look like a mistake.


I dipped this in green celedon however the glaze has massive amounts of crawling, I happen to really like the color where it's extremely heavy so I may have to use that in the center of something where it can't fall off, but it's no good to apply it heavy to any side because gravity will take over.


This piece was another experiment where I textured the outside, and I really like how it turned out. The only difference is I would put a foot on this so I could glaze the entire textured area, although I like rocking it back and forth since it's not a flat bottom. The nice thing is it doesn't tip over it's actually fairly stable so the stuff I put in it will stay in it even if it is moving around. I also am going to try this color combination again.
The one thing I do have to say is I have no real room to put all this stuff but I love making it and eating off of it!
Sunday, March 10, 2013
Dropped Plates
So I saw this video on youtube where a slab of clay is layed into the mold then dropped to create a gentle slope.


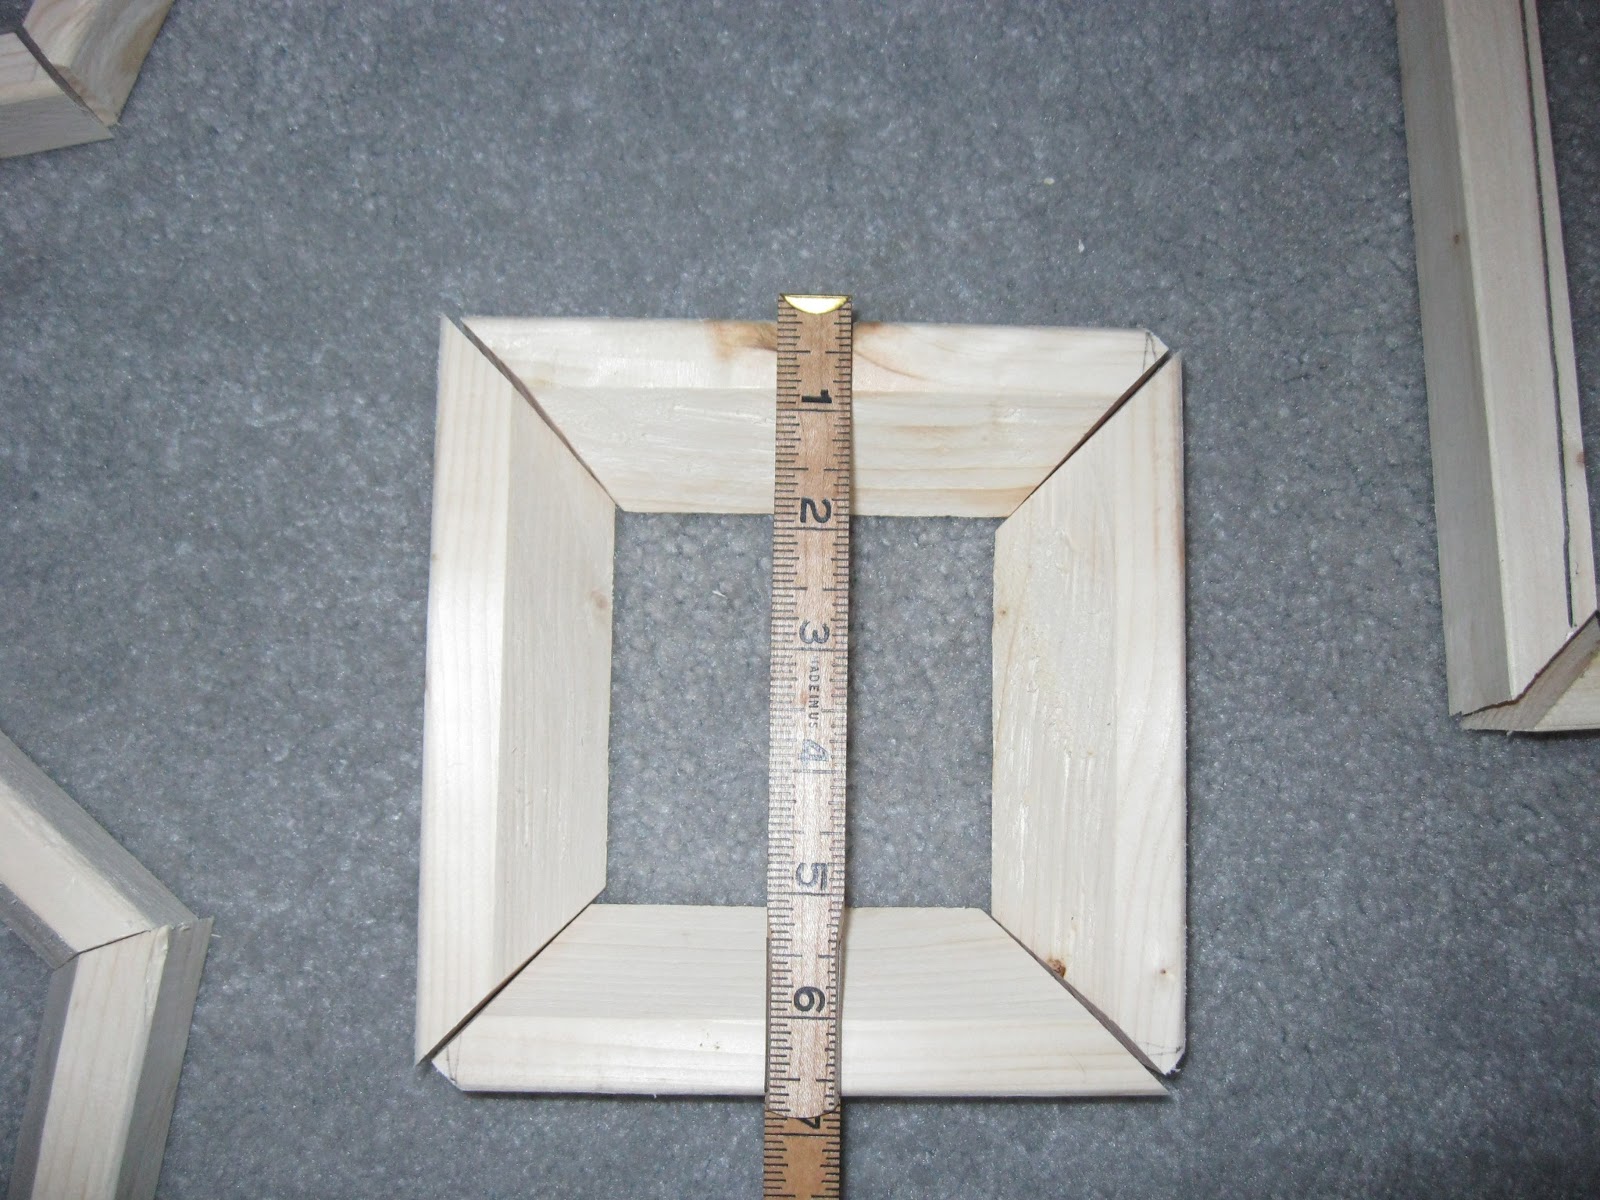
 So what do I do I go buy a saw and some wood! I was able to cut 45 degree cuts with a miter box and saw I picked up from Harbor Freight for about $9. And a 2x2x8 piece of wood was just under $2 from Lowes.
I made a square and a rectangular box. Then I realized that the right angle wouldn't make the clay slope nicely so I wanted to cut of a chunk from the corner. However I had no confidence of being able to do this evenly on all pieces with my hacksaw....
I then turned to facebook for some help. Through friends I found out that one of my friends actually does carpentry work and had tools at home! So he invited me over to help me cut. I couldn't pass up the opportunity to grab some more wood. So I headed over to his place with just under 24ft of 2x2 pieces of wood.

 So he first showed me the table saw and how to cut on an angle. Then told me the one rule was to not cut off my fingers! Then we were able to cut the chunk I wanted out of all the pieces of wood. Then I happened to mention I only could make 45 degree cuts and thus could only build squares. Then he pulled out another nifty saw that could cut all different angles into the wood. I now know that I want to build a house that needs tons of cuts with a saw like this! It was so much fun to use. We ended up cutting up all of the wood and I ended with two square molds, one rectangle, and three hexagons!


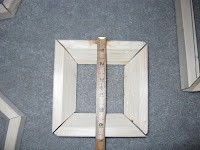


 So what do I do I go buy a saw and some wood! I was able to cut 45 degree cuts with a miter box and saw I picked up from Harbor Freight for about $9. And a 2x2x8 piece of wood was just under $2 from Lowes.
I made a square and a rectangular box. Then I realized that the right angle wouldn't make the clay slope nicely so I wanted to cut of a chunk from the corner. However I had no confidence of being able to do this evenly on all pieces with my hacksaw....
I then turned to facebook for some help. Through friends I found out that one of my friends actually does carpentry work and had tools at home! So he invited me over to help me cut. I couldn't pass up the opportunity to grab some more wood. So I headed over to his place with just under 24ft of 2x2 pieces of wood.

 So he first showed me the table saw and how to cut on an angle. Then told me the one rule was to not cut off my fingers! Then we were able to cut the chunk I wanted out of all the pieces of wood. Then I happened to mention I only could make 45 degree cuts and thus could only build squares. Then he pulled out another nifty saw that could cut all different angles into the wood. I now know that I want to build a house that needs tons of cuts with a saw like this! It was so much fun to use. We ended up cutting up all of the wood and I ended with two square molds, one rectangle, and three hexagons!




Thursday, December 6, 2012
Glazzed
I didn't keep track of how many pieces I made... however I did keep track of how many pieces I glazed.
I must have been on a mission to use almost every glaze in some way or another. What follows is a general description of each piece then a description of the glaze process. (More pictures to follow)
I must have been on a mission to use almost every glaze in some way or another. What follows is a general description of each piece then a description of the glaze process. (More pictures to follow)
- First small 'bowl' in brown clay
- This was from the previous post
- Plate with blue slip design with spirals
- Aquamarine Sorbert with a spray application on top
- Concentrated spray in the middle
- Plate with blue slip design with dots
- Aquamarine Sorbert with a spray application on top
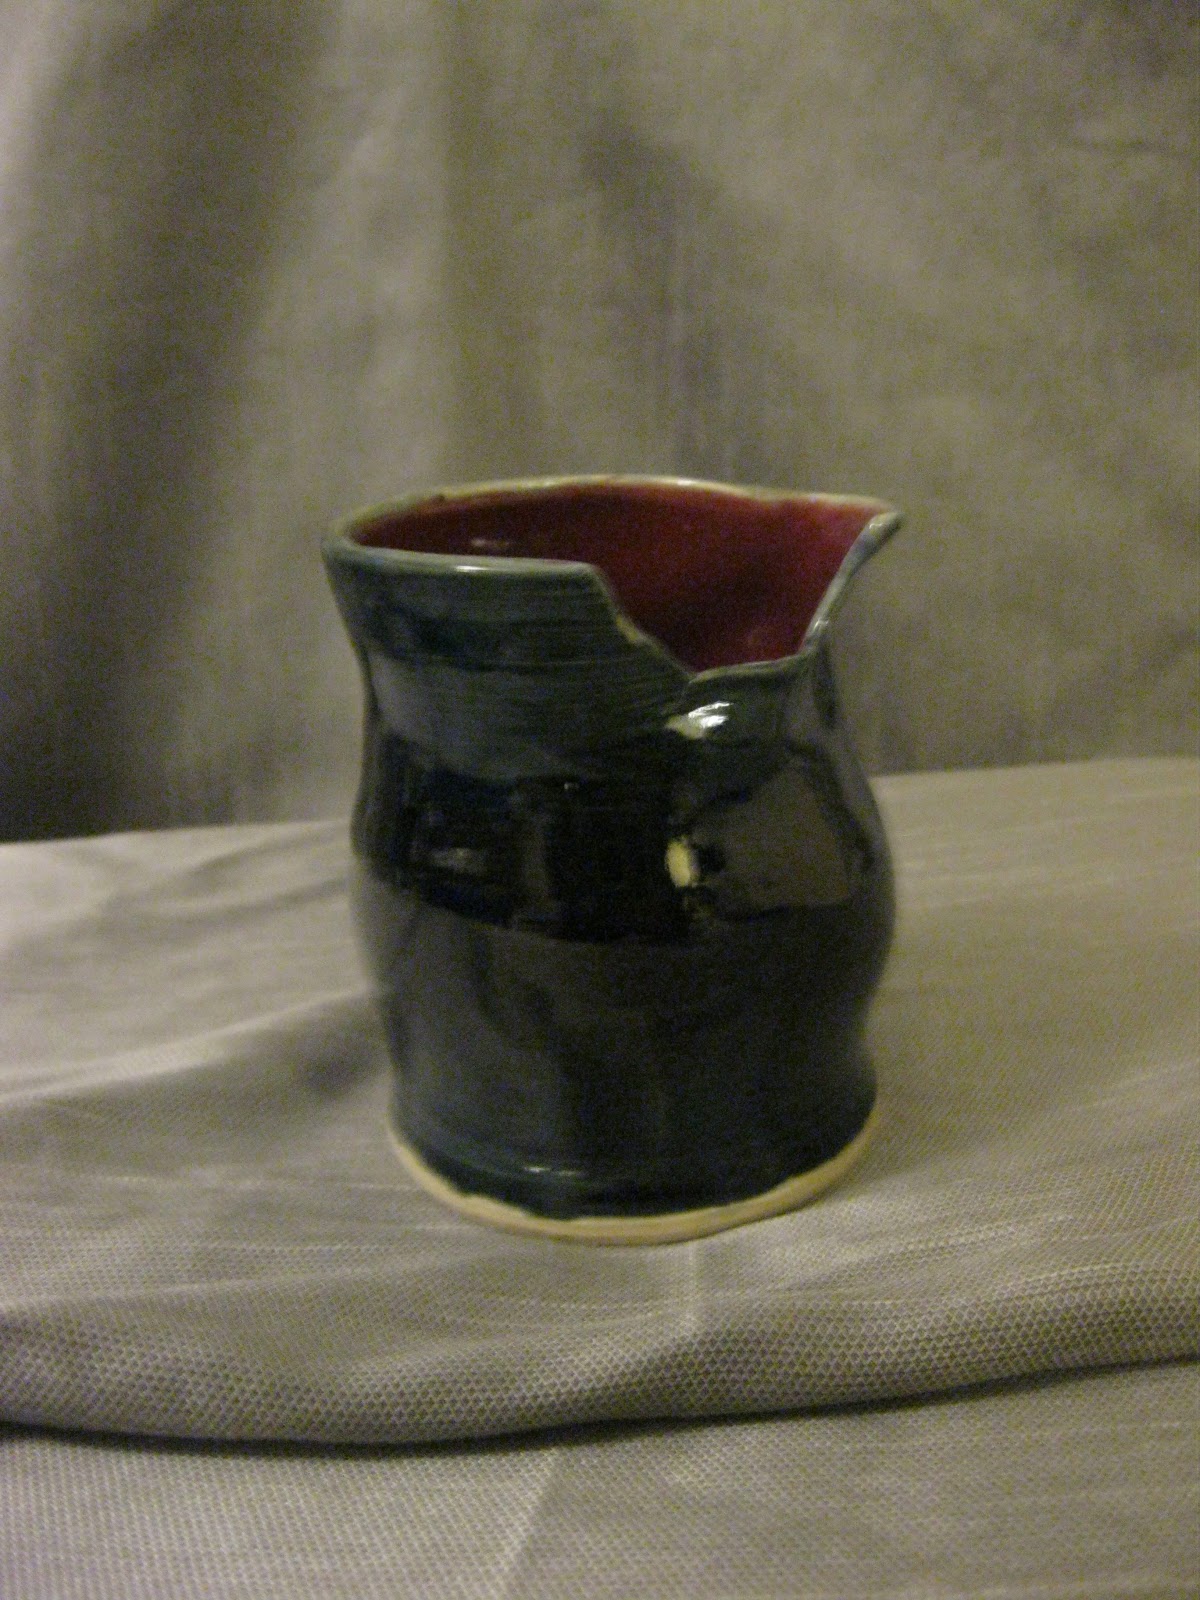
- Tiny vase with a chip out of it
- Poured Mauveyish on the inside slowly rotated it and then dumped it out
- Sprayed Ebony on the outside
- Tiny vase without a chip


- Poured Ebony on the inside slowly rotated it and then dumped it out
- Sprayed Mauveyish on the outside
- After glazing it came out with strange bubbling on the inside with spots that appeared to have had the glaze dripped off inside sections
- Re-glaze involved heating with hair dryer and painting more Ebony on the inside and Re-painting the upper half with more Mauveyish
- Vase with blue slip on outside and dots on lip
- Poured soft white on the inside
- Dipped into Mint Green
- Little bobble pot


- Sprayed Ebony on the inside (light coat)
- Dipped half in Celadon
- Dipped half in Noxema Blue
- Vase
- Inside Noxema Blue
- Outside dipped into Ice blue
- お母さんの誕生日(4)


- Inside on the bottom Katlyn's Green let dry then put wax over it
- Poured in Powder Blue and wiped off from the bottom of the inside
- Dipped into Noxema Blue for the outside
- Plate with brown slip
- Sprayed a base of Chamelion
- Sprayed shots of Seafoam radiating from the middle towards the outside
- wavy rim bowl
- Curious george inside and on the top
- Noxema blue on the bottom
- Large plate
- Kilin Room Blue sprayed on
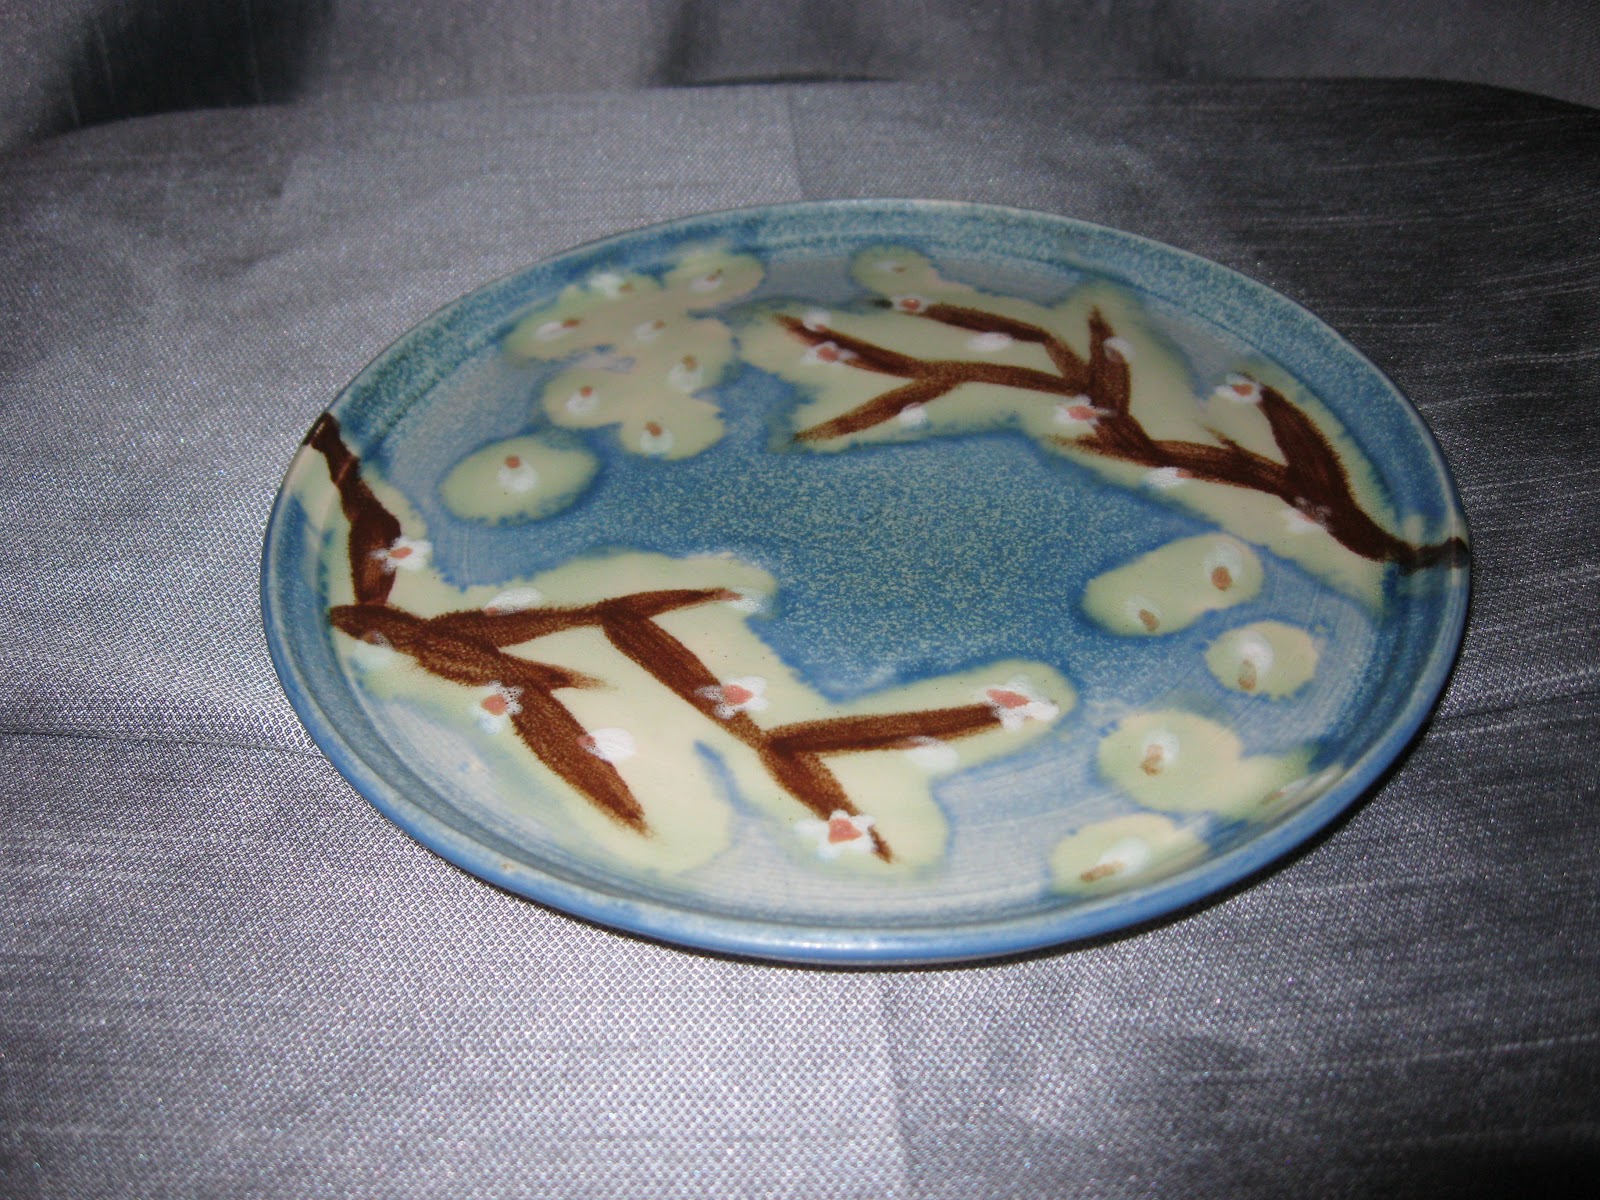
- Underglaze painted design in Red brown/white/pink
- Clear glaze painted over dry design
- Wax over clear glaze portions
- Spray Golden Blue over the top of everything
- whipped off Golden Blue from wax portions
- Small plate
- Chameleon sprayed on
- Underglaze painted design in Red brown/white/pink
- Clear glaze painted over dry design
- Wax over clear glaze portions
- Spray Golden blue over the top of everything
- whipped off golden blue from wax portions
- Chipped pot
- Ice blue on the inside
- Noxema Blue on the outside
- Second small 'bowl'
- Inside Floating Red with Floating Blue on top
- Outside Floating Blue with Floating Red on top
- White bowl
- Lemon curd on the inside
- Oribe on the outside
- Largeish vase
- Oribe on the inside
- Xavier's Jade on the outside
- 3rd Brown bowl


- Inside sprayed on Soft White
- Poured Mauveyish inside
- Underglaze design Black/Terra cotta/White
- Wax (dripped a bit so need it to be a horizontal surface to apply wax)
- Sprayed the outside top portion with Aquamarine
- Sprayed parts of the bottom portion with Katlyn Green






Subscribe to:
Posts (Atom)