Sunday, October 24, 2010

Spiraling out of control


One night I was on the internet... which is never good in the middle of the night.. I tend to buy things. Well this time I decided I wanted to buy a larger crochet hook. (This might have something to do with the tiny stitches in the last blanket) So ebay sucked me in with a set of about 10 bamboo crochet hooks for $5.00 shipped. It shipped from Hong Kong and took just under 20 days to arrive. Although after about 15 days I decided I must have a project, something simple since I haven't followed many crochet patterns so I settled on a nice quick baby blanket.

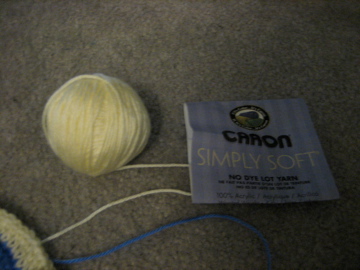
I ordered 5 balls of yarn from MaryMaxim website. 2 in this cream color and 3 in the nice berry blue.


It took about 2 hours to ball 2 of the balls and to start the blanket with the spiral pattern

This pattern works with both colors at the same time so once I used each I don't have to add in any other I just crochet with one till I catch up to the other and then switch.

 You can see how the center spiral starts
This shows the white catching up with the blue. I started using paper clips to hold each color in the right place. But quickly realized i should switch to safety pins because of how easy it was for the clips to either fall out or split the yarn.

The blanket is going fast it consists of about 26 little triangles of a specific pattern. 


one more strip!

I managed to finish the remaining strip for that blanket I've been working on for the past few years. 
At the moment I have no idea what type of yarn I was using and thus no idea of the sizing since I was sizing it by just using the entire ball of yarn.

So the next thing I might do is change color or maybe make different looking stitch for other strips to make it longer.


You can see the length of the strip since it is folded over and has a normal mechanical pencil next to it.

Thursday, September 30, 2010

how many strips does it take to...

Here are a few pics of the past 6 yrs of crocheting this "blanket".
There are 5 strips of black, one of navy and a few white squares making up that first row. Since I have no idea what my original design was going to be I'm going to change it to fit, Possibly ignoring the white blocks and using the blue as a border, then alternating black with a different color.


If you look closely these 7 strips  give me about 30'' of length. So I think I may need another 10-14 strips! When I used to do this on a regular basis it would take me about 1-2 weeks per strip. Thus I could finish this in about 5-7 months...

Tuesday, September 28, 2010

Picking up where I left off

When I was much younger I considered knitting. Then I realized I didn't have the patience for it so I switched to crocheting. Later in life I had the idea of making a blanket by making strips and then sewing them together. Each strip was about 1 skein's worth of yarn. I was using black and dark blue yarn. I have since forgotten the ultimate pattern. However crocheting is very relaxing and since I can't sleep and I came across it recently I decided to pick it up again for the times where I just need to relax.

I figure I can come up with a new pattern at a later date since I know it will take a while to make these strips (I started it over 6 yrs ago)

I'm using a f size crochet hook and am thinking of picking up a bigger one for any new project since my stitches tend to be on the tight side.


Hopefully once I can work a bit more consistently and be done sometime within the next 5 or 6 yrs :).

Sunday, September 26, 2010

Cookin to dye for!

I have a skirt made out of muslin but apparently Esmeralda's skirt isn't natural colored!

What is a girl to do? Well into the kitchen with me.
I have this awesome electric kettle since I love to drink tea. It is much easier to boil small amounts of water in this than large amounts on the stove. To dye lots of fabric you need space. Over a year ago I got this notion that I really wanted to can my own jellies and such. More on that another day. To dye you need a very very large pot and preferably one you don't ever intend to put food in. Lucky me I have this!

So to start I boiled about 48 cups of water and added it to the large pot and kept it at a simmer. Then to use powder dye I need to dissolve it in water before adding to the dye bath.  I had 2 open packages of royal blue powder dye and 1 open package of purple powder dye from dying my 'magic skirt'. I decided to use the remainder of all 3 of these


I have this plastic container I no longer use to hold food. So i can use it for dissolving the dye into hot water. Whenever working with dye (especially concentrated dye) it is important to wear gloves.


The package holding the powder dye has tons of directions 


In those instructions it says I first need to wet the fabric with hot water. I also added a bit of laundry detergent since I didn't exactly wash the fabric before messing with it. 


It also says to add salt to the dye bath, 1 cup of it for 3 gallons. I now need to get more salt.


 In addiction to dying the skirt I realized that the scarf should be a very similar color and considering all the water and dye I was using already I added a bit of wine colored liquid dye to the mix (about 3 oz worth) after I had finished with the skirt.

However to dye the scarf I needed a scarf.
On the left you can see that I used my serger (with black thread) to serge this strip of fabric about 60" long. Then I turned it inside out (on the right). I figure once I add the coins it should hang properly.


mmm yummy. This is the scarf in the pot.


The more blueish fabric is the skirt the more purple is the scarf. Both these pictures are when they are wet. Th one on the left right after they have been rinsed until the water runs clear then wrung out. To the right is after a day of sitting in my sink. If they don't dry completely in a day or so I guess I'll throw them in the dryer.   


Both colors are significantly darker than I expected but we'll see if I can work with it when it is dry.
If not I may just start over!

accessories to fit


I was in the hair store the other say and managed to leave without any hair! (Granted i brought two friends who both left with stuff) Every time I'm there I look at the jewelry section.


I picked up this silver wrist cuff and a black headband. I figure for the headband I can cover it with fabric by sewing a cover with the fabric, slipping in the headband and hot gluing the fabric to the headband. The headband was $.99 and so was the wrist cuff :)

The cuff is a bit narrow but I figure it would work since I look a bit funny with a larger one.

Of course I need a gold one not a silver one...

I had some gold paint and I figure using q-tips wouldn't leave streak marks. You can see that the band is a bit decorative but not overly noticeable from far away and I'm hoping the paint will cover it.


It looks more or less gold. I painted both the inside and outside so you won't see silver if it tilts on my wrist.
After it dried you could still see the design so I coated it one more time with paint. If it still shows threw I give up :-p


Thursday, September 23, 2010

megamisama

I love ah my goddess :) If you can't tell from my profile pic :). Especially Urd. I would like to cosplay as her one of these days and luckily over at world of elegance they have a few pictures of some of her outfits. I'm not quite daring enough to try her main outfit. (That slit is a bit much for me out the moment) I figure once I can figure out the best way to keep the outfit on I may try.

But now I would like to go with this more conservative outfit.
I figure still recognizable and I have almost everything except for the dress.

In order to figure out how to make this I'm using the stretchy material that I bought the other week. (Ok I may have gone back for more) My idea is that If i go with this fabric then I don't have to worry about darts and zippers and I should still get the same effect.


I had bought a dress for about $20 shipped from china to try and work out the pattern. The only patterns I found were on the internet in chinese. So I figure I can just cut appart the dress and work from there. Of course I tried it on when I got it and it was horribly sized. The hips were to narrow, the waist to big the bust to small. Only the arms fit (yes it was sleeveless).


After sewing the front and back together I end up with a bigger pattern then I expected. And had to pin and fit it. I figure if i make it a bit on the smaller side then it'll just stretch to fit because of the fabric. You can't see where it comes over but I promise you it is there. This really needs the trim to stand out properly.

I also cut out the neck but have yet to attach it to see how this works out. I cut 2 pieces and 1 piece from interfacing to make it stiff. I need to iron and sew them together before attaching to the dress.

One thing I have learned from this is that this material shows every little bulge. I will need to make some sort of lining or under-dress that will hold everything in place. otherwise this almost looks promising. I put 2 darts in the back but I think the way I added them with the serger made them not lie down properly. I also thing I should have measured better because they ended up being a bit lower then I needed them.  But I figure this isn't half bad for the first half of the first attempt. I may try to make a shirt in this fashion next to get time to work with the technique and have something else to wear.