Wednesday, September 15, 2010

Just a hair or two away!

I finally finished the main portion of the wig. Well I really hope it's the main portion considering how much time I've put into it. And here are some pictures of this last bit of progress :)

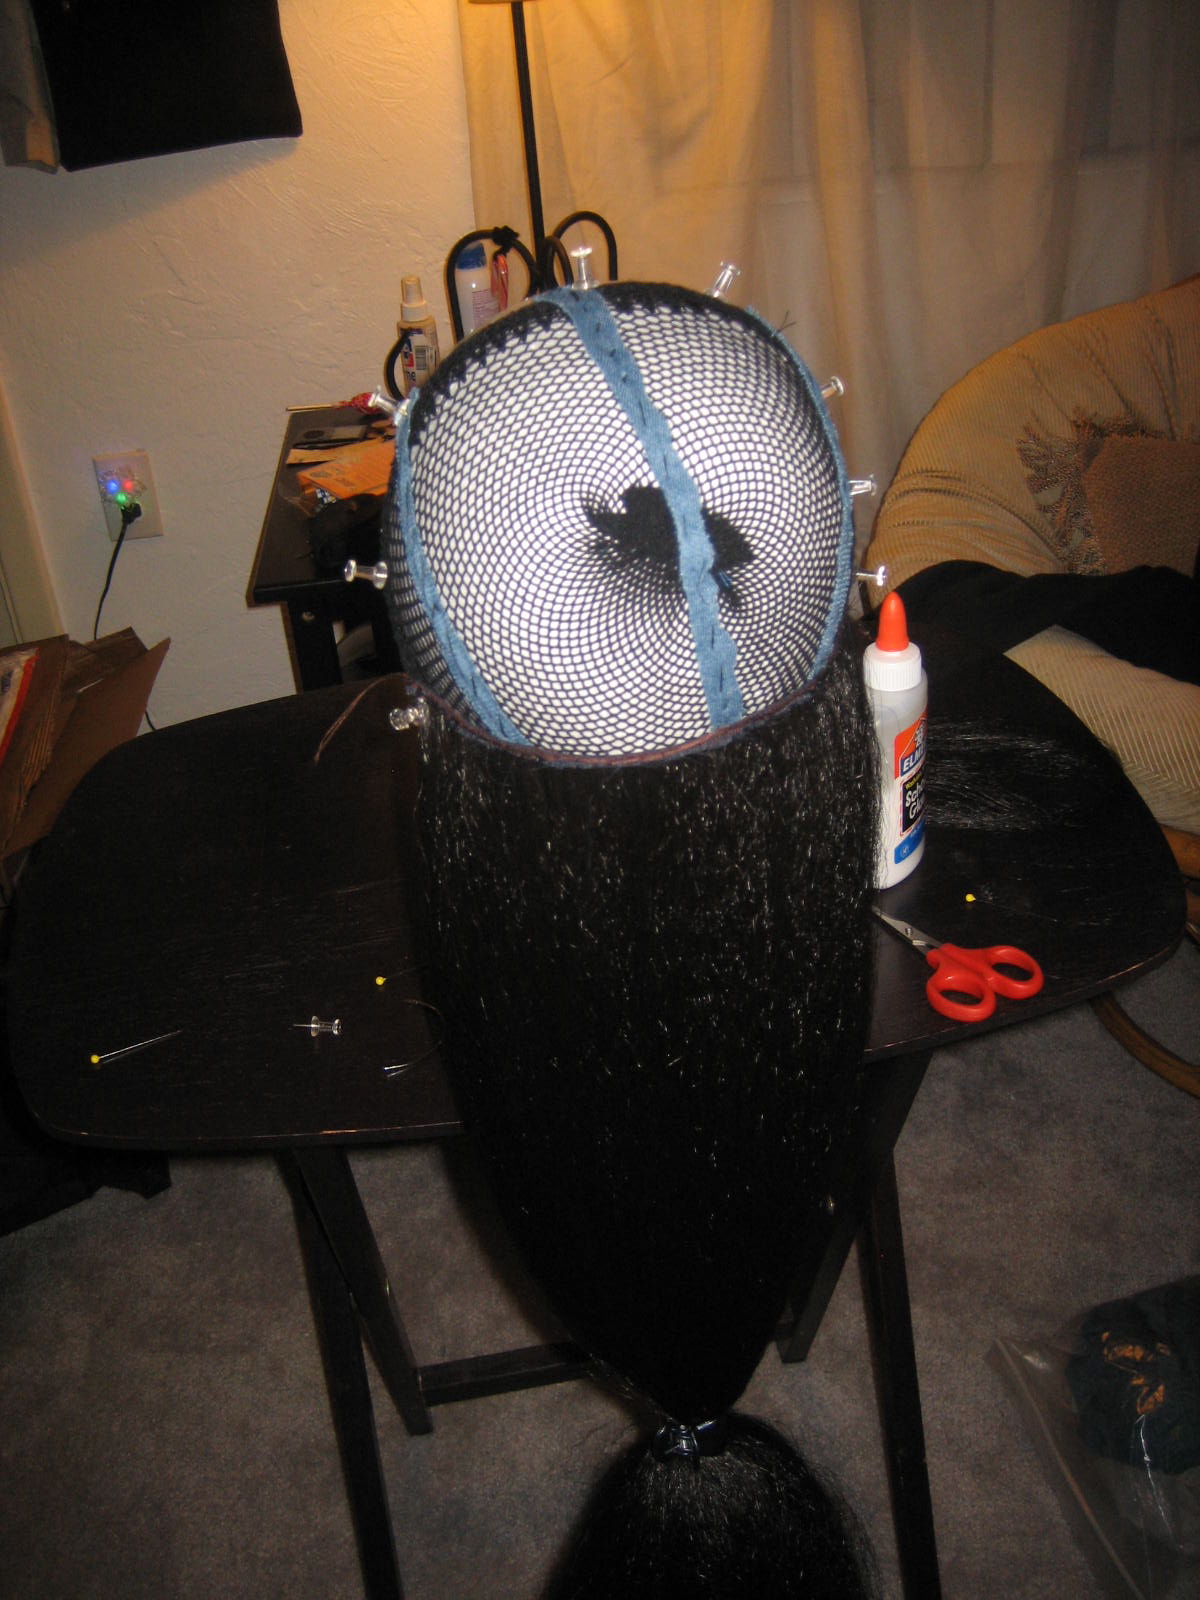
You can see that I've basically gone almost all the way to the top. The reason I didn't is because it will be easier to sew the last layer to the elastic if the elastic doesn't already have stitching attached. When I made the last track to attach I made the middle part of it about twice as thick as the previous 3 tracks so that It would adequately cover the mesh cap.


This is a lot of hair :)  You can see how much it poofs. I'm planning on somehow attaching something between the tracks near the middle of the top of the crown so that it sticks out a bit more. I now know I have plenty of hair to cover whatever contraption I manage to rig and sew in.

You can see how straggly the ends are on the left, so I decided trimming them a bit won't be so bad. I figure I will have to cut it down a bit but not sure how much till i get some light curls into it and the contraption.  On the right you can start to see exactly how think it is since I'm only parting a small section and not even making it poof to it's full potential. Below is it after a bit of a trim. Not perfect but a bit neater.
I love how much hair it is and I am excited to try it on but I just have to wait till I sew on the last 2 tracks and the maybe even have to wait till I style it (Or maybe not we'll see)  When I'm not messing with it or taking pictures I leave it in a pony tail with a loose elastic wrapped around once and holding the hair tightly with a tiny claw clip.

I can't wait to see how this comes out all finished!

Tuesday, September 14, 2010

The skirt advances!


I went into walmart to get some sort of elastic for the waistband of the skirt. I figure that way it would lie down under the corset and I wouldn't have to worry about any unexpected sizing changes in my waist area. So I'm looking around and I see elastic 'thread'

I figure this will be worth a shot since it was only $1.47 for the entire spool and it had decent directions on the back.


The first thing I did to the skirt was serge the upper waistline. I did this with the intention of just finishing the edge so I could cleanly fold it over to make a waistband. (Which i'm leaning away from now but still may do) The brighter white color is the thread from serging. Thankfully it all turns out looking about the same color since I plan on dying it later.


I decided to sew rows of the elastic thread in three different spots, one opposite the opening and two ad the midpoints between the opening and the other side.  I figure this will make it not seem quite as gathered. 


So to start this little adventure I first had to prep the stretchy thread. The instructions basically said to hand wind it on a bobbin tightly for really light wait fabrics and moderate for other fabrics.


After this was done I just had to place the bobbin in the sewing machine, normal thread through the needle and I had to set my stitch length to about 4.0. 


Of course I did a few test runs before trying it with my skirt!

And look at that isn't it neat!
(I used brown thread on white fabrics so I could see exactly what happened to the normal thread but normally it would match.)

So now it's time to sew the skirt. I first attempted 3 rows and realized I needed it to gather quite a bit more so I put in 5 rows in each of the 3 spots. (It's elastic it can always stretch) I realized that if I put the rows closer together then they gather even more so I'll try to remember this for next time!

And thus the waist is gathered! The next step is attaching fasteners to the opening so I can close the skirt... I'm thinking of either putting in a few snaps ( I have some lying around since I was planing on using them in another project) or possibly some tiny eye hooks. I'm leaning towards the snaps since the hooks may dig into me if they end up under the corset. Or I may think of an entire different way to close it between now and when I actually close it. After that my next step is to hem it and possibly do so with some sort of trim on the inside at the bottom. The skirt doesn't have any adornments on the bottom for the costume however to make it flow properly I'd like to add some weight somehow. Usually just the extra fabric sewed into the hem works but I'm not sure how much extra there will be and if it will be the same amount all the way around.

After the closure and the hem It will be time to dye it. I looked on the Rit website for colors and decided some mixture of Purple and Royal Blue will give me the right color. Lucky me I have some of both left in powder form. I used them to dye my 'magic' skirt.

Sunday, September 12, 2010

A hair longer than expected


For some reason I thought this would take a day at most.. maybe a little longer. I thought I'd be done by now but at last I'm still sewing. Although I think I now could go much faster the next time around by making all the tracks at once and sewing all at once since now i figured out how to measure it. I love that I'm learning new things about it every day and I like being able to improve. For now I just get to share with you pictures of where I am at the end of the night.


Although I didn't exactly work on it that much today so maybe I could have finished if i worked more hours today. Instead I made cookies with a fellow student who wanted to learn. We made some great oatmeal raisin and chocolate chip cookies. She also made me some great chicken :)

A mostly hairy day


Today I set out to finish the half wig. I started bright and early and might have finished if i continuously worked on it.... In any case I finished sewing all the tracks I made, as well as 1 more pack worth of hair.  I manged to not get the size of the tracks right at all so i lost a bit of hair when I had to cut them down. This is a picture of my first attempt to sew to pieces onto the same line. Can't even tell (you can also see the c-needle I use to attach the weft).

So after getting to this point I realized I only have the first two wefts I made left. I made these extremely thick since I didn't know any better. I decided it's best to use them on top of the crown of the head so i can get that angular shape of her hair. Thus at this point I went back to the store and bought 3 more packs of hair.  I've been getting the $2 packs of hair and this time decided to get one of the $1 packs to see how it was different from what I was using (I wanted to stick with the same hair so I just kept buying the more expensive one). So I measured for 2 tracks of hair and then went to make wefts. The $1 pack required a bit more work I had to pull the hair and mess with it to get it to act like the $2 hair but eventually it worked out and I figure I can cut my cost in half the next time I do this :).

I measured around and determined I have 4 tracks left to make/apply almost there! And after that I get to style it the way it should be :) So here are some pictures of how I leave it tonight.


Next the shirt!
I manged to get distracted from the hair a bit (Around the time I realized I needed more hair and thus had to leave the apt). I decided to try to figure out the best way to draft a collar so I looked around the web a bit and saw where someone used pattern pieces to measure for the collar so I just used the shirt and drafted my own.


I measured the top and made a pattern on paper for half and used the fold.


Next I added interfacing to one side


This is the way the shirt looked before I started with the collar:


After attaching the collar I'm realizing that I need to split the front for it to lay properly.

I also need to trim the excess fabric from the front.
You can see that it's not finished, instead of slip stitching the collar I'm going to attach a lining of sorts. Something unfinished but just a second layer of fabric so it's not quite so see-through.

So that's the progress on the shirt.


Next taking a bite out of accessories.
 I manged to pick this up from the beauty store for $1 :) It is about 12 bangles interlocked but since it's cheap they were easy to separate.

I left a few closed (not pictured) To serve as the bangles she wears on her wrists but these I'm hoping to glue or solder together to make the remaining jewelry.


And thus concludes my long day of crafting (maybe tomorrow I'll get some homework done.)

Saturday, September 11, 2010

My Magical Skirt

So I see those fun swishy skirts at old navy and I wanted one. But for some reason though "I can do that better and for less money" So i managed to get a pattern M5812 from McCall. Then I decided to make it out of muslin and just dye it (That way I didn't have to buy different fabrics). One day I'm going to learn making it myself isn't going to be cheaper most of the time.. but sure is a lot more fun. So this pattern takes a full 7 yards of fabric so that $30 skirt from old navy is now about $15 for pattern and fabric. I managed to have about 5 yrds of muslin lying around and another yard of some other material. So instead of just going out and buying another yard or so of material I decide I should just buy a bolt of muslin.

Now after several days of cutting and sewing pattern pieces together I now have about 7 tiers of fabric. So now I get to dye it! I used a random mixture of rit powder dye which i'm sure I couldn't recreate if i wanted to at this point.

 I had to lie them out so they would dry a bit.


So I decide waiting for it to dry would take way way too long. So i threw all of them in the dryer for a bit which worked ok, except next time I would be a bit more careful with it unraveling and getting the pieces tangled up. Took me almost 30 min to untangle each piece.

So after this I had to sew each tier together. To do this I used my serger to gather each lower piece before attaching it to the upper piece. I changed all the settings, however every single time i manged to over gather and had to try to ungather it.


So after many hours I managed to get it all sewn together. Although half way through making the original pieces I decided I didn't like the closure at the top of the pattern so I decided to just make it a bit wider at the top (even more fabric) and and a place for a tie.
And after several (nonconsecutive) days of work I finally had my swishy skirt for about $20. It is definitely a great skirt it weighs 3lbs in total and i love the swish of it! But i think next time i'll just fork over the $30 and get one from old navy ;)

Friday, September 10, 2010

The Hair part 2

So Part 1 has no pictures and was covered already so this is part 2 :)

So after sewing the combs to the wig cap i sized it on my head and sewed little strips of fabric down it so I could tell exactly how large the wig should be. The fabric is a bit stretchy so i can make it bigger to go on my head initially.
You can see the thumb tacks around it to hold it down. Initially I was using pins but then i realized that they got caught up in the hair way too easily and these worked a bit better.
You can see how it sits back from the top of the head because it's a half wig. Can also see the combs I sewed into it. I had to detangle it from the cap since the spokes have a tendency to go through holes.

I started from the bottom and had the idea that I was going to use the glue to tack the track up while I sewed it. That lasted all of half a second since apparently glue doesn't hold instantly and it was making my needle gummy. But you can see this is the first track i sewed on!


And here are more pictures as I went:

I got a bit off center thinking i had to have them line up equidistant from the previous one at all points. But I realized it should work just fine as long as i go straight across and the ends are equidistant. 

So pic of how far I got before sleeping:


I'm hoping I can take care of the rest of this without having to buy more than 1 more pack for the center and 2 for the outer hairline.