Monday, November 5, 2018

Erza Clear Heart Cosplay part 2

I started writing this right before the con ... then forgot that I hadn't actually posted it! Unfortunately  I have only a few pictures for the second half. But hopefully it still makes sense.
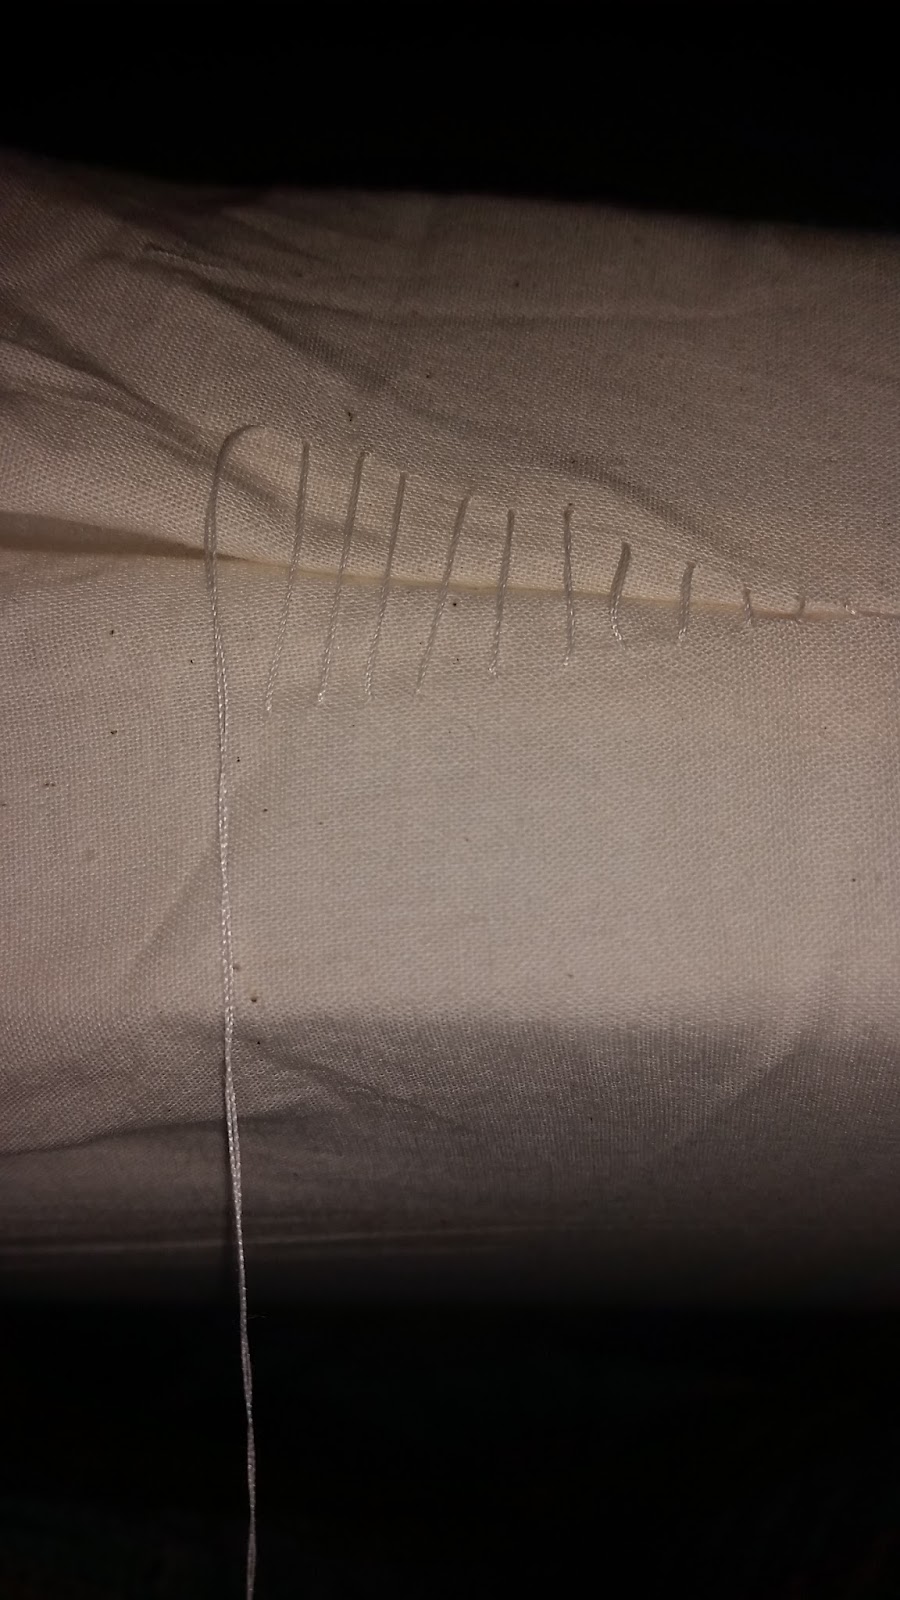
After sewing the flames to the pants I hemmed the pants and sewed over the black border to secure the hem. I used black thread on top and yellow in the bobbin to hide these additional lines. I also sewed farther to the tip of the black to secure that part.
I had help pinning the hem since every time I moved the fabric shifted. (and for once I had help on-hand)

Then I had to think about the white section. First I thought of just making a second set of under-pants, but I thought it might shift and expose other things. Then I thought about sewing two sets of pants together (one white one the red/flame) but it might get bulky and hard to move. So instead I created pockets by taking what looked like a loin cloth, sewing in elastic, and attaching it to the opening of the red pants (and honestly create pockets whenever possible is always the answer).


Next I moved onto the earnings. I ended up making them twice. I found cheap earnings at Walmart for $3 but they had three loops. So I broke them apart and re glued the clasp to the smallest loop.
I then used a foam sheet and cut out the shape for the earnings and used hot glue to form the shape and adhere them to the loop. 

I then read that with parchment paper you could smooth out the hot glue. I then painted them silver with nail polish. Once done they were a bit bigger than I wanted so I re did them this time entirely with hot glue. I flattened and smoothed almost a stick of hot glue then cut a much smaller pattern out of that and just reheated sections to make it all stick together. I also cover it in silver nail polish.
 
The top was one of the easiest parts. I took stretch fabric and sewed it in a tube one way, then made a long thin tube of white fabric and sewed that into the seam to wrap around as if it was the entire top. Once I tried on the tube top I just adjusted the bottom to fit closer to my body and sewed the tube top slightly in on the bottom. I'll need a safety pin to pin the wrapped section to the tube top.

I invited a friend over to help with the wig. I decided Erza would really have a messy ponytail and was less careful about making it perfect, just tried to hide the wefts. I put on the wig and held it to my head while my friend pulled it into a ponytail.
I then broke a mechanical pencil in half and used that as support in the base of the ponytail and wrapped it with green ribbon. I braided the ponytail to get it out of the way as I tried using wig gel and hairspray on the rest of the wig. Old hairspray doesn't work very well so I'll not be doing that again. 

I was all set except that it's winter and she goes barefoot in this outfit so I bought toe socks and will wear flip-flops. When I got to the convention I realized a few things. 
One: My feet slipped around in the socks 
Two: I didn't bring all the makeup I needed, just foundation and
Three: That I left the temporary fairy tail tattoos at home >< 
This prompted a quick trip to the CVS luckily only a few blocks away. I can't quite remember how much I spent, but it was at least $45 in makeup and poster board paper. I bought eyeliners stabilizing powder and spray and a variety of other makeup things recommended for "fake" tattoos. I traced the symbol onto the poster board, cut it out and then used my low temp hot glue to glue it to my arm so I could trace it with eye pencil. I let the hot glue cool down a bit before sticking it to my arm, I wouldn't recommend squeezing hot glue directly on your arm it would hurt. Once traced I filled it in with the eye pencil then traced it again with liquid eyeliner. I then sprayed it with the staying spray and dotted on the powder. I was so glad that the tattoo didn't smear during the day and I had quite a few people really in awe that I would actually get a real fairy tail tattoo! ^^
 

While I had extra poster board I also cut out feet. I put the cutouts on the bottom of my feet, then pulled the socks over them. I then added hot glue to the bottom of the socks. I was able to take the socks off while leaving the poster board inside for the glue to dry. This helped with traction for my "bare" feet. I had fun running around the convention and even ran into natsu! (happy was off somewhere else at the time ;)


Monday, November 20, 2017

Erza Clear Heart Cosplay Part 1

This is my first serious cosplay crafting/blogging after graduating. It's taken a few years but hopeful this works out.

I actually bought more pieces of my outfit then I had previously. one of the perks and downfalls of having a job slightly more money (not much) but a lot less time. I decided to go for her clear heart clothing, mainly because it's simplest and something I think i can pull together in a few weekends.

The only thing I didn't like about this outfit was the amount of exposed skin, i'm also quite top heavy so the idea of trying to find strapless support was frighting, no support is not an option and clear straps end up being very shiny/reflective. So I decided to go with a leotard with short sleeves.  I bought it off amazon ($18) in a "nude" color... which isn't even close to disappearing on my skin. After searching a bunch of blogs and such I saw a few tips from ballerinas on dying with Rit dye. I decided to get a new pot for $11 so I don't contaminate anything else and use some old coco brown powder dye I had left over for a different project. I used a hot water bath and dyed the leotard for about 4 min and the rinsed it multiple times. I also hand washes it and hung it to dry. Once dry I think I got fairly close definitely not far enough off to re-dye it.

I was about to buy more fabric, then I realized that since I've wanted to make this outfit for a while I probably already had fabric I rummaged through my craft room and found about 2-3 yards of red fabric and maybe 1.5 yards of yellow fabric. I decided to eyeball some of the measurements, but cut out 2 pieces for the backs and 2 for the front. I sewed the back and front of each side together (but not all the way up),  then used a basting stitch to sew the crotch. I then realized I was out of fabric and didn't have enough to make the back portion.

Off to the store, where I bought some more red fabric (luckily it was the same color since I forgot to bring a sample) 2 packages of black bias tape and some stretchy and non stretchy white material for the top and the white elements on the pants. I know I need t
he white belt on the pants, but I haven't decided if I will make a second pair of pants to sew inside the first, or try to make pockets.

The next step was adding the flames, I sketched a few things on paper and cut out two shapes. Then I traced them repeatedly on the yellow fabric and cut it out. Next I sewed the black biased tape to the yellow flames. I actually took the time to iron everything which made the sewing quite a bit easier.

Next sewed the yellow and black to the red pants. I used quite a few pins to make sure the flames didn't move around too much. Sewing in the shape of flames is already difficult, So I took out the basting stitch in the crotch to make the legs lay flat. I left a large chunk of yellow at the bottom I plan to hem since it looks like the inside is also yellow at the bottom.Then I sewed the crotch area again, I'm thinking I will probably add an additional zigzag stitch and use a black marker to make the flames look like they line up and have sharper peaks once i cut away excess fabric.

At this point I had to take a break and get ready for the rest of the week, although I did pick up some oil sheen and sprayed down the wig I bought off of amazon for $27. While I was on amazon I also picked up a few fairy tale temporary tattoos... 15 for $9. I know I only really needed one, but I've already applied one just because it's fun!

Next tasks:
  • Make the top
  • Add white to pants
  • Hem/finish pants
  • Style wig

Sunday, November 19, 2017

Zabuton

I started this post back in March of 2016... but apparently never posted it (i forgot to add the images...which I've done now)


My old futon disappeared in my move and instead of getting a new one... or replacing it with a proper couch, I decided I rather liked the open space and would rather sit on the floor. This was great until my bottom complained. So instead I decided for a while it would be fine to use my stuffed animal. He is very comfortable but not exactly practical. This is when I started my hunt for seat cushions. I had wanted to buy zabuton(座布団) while in Japan bit couldn't fit it into my suitcase so I started searching the internet. I came across lots of yoga supply stores selling them for around $35 to $60 each.
My craft room has barely been touched in months... so I decided this is a great project to get back on the proverbial horse.
I found all purpose foam at home depot for $25 that is 24x72x3 this is slightly bigger than normal zabuton but I like it soft and big enough to curl up on and sit multiple ways.
I know I have razor blades somewhere to cut the foam with... however after looking for about 20 min I figure they are a casualty of the moving war and ordered an xacto knife online for $5.
Once this came I was able to easily cut the foam into 3 relatively equal pieces.
Next to cover them. I've decided to try and use


up some of the fabric I have and found several yards of muslin. I cut squares and sewed three of the edges up and put the foam inside. I then slip-stiched the last side closed.
One thing I learned is if you are watching TV and reading subtitles while sewing ...you should probably also wear a thimble.


Once the foam was encased in the muslin i sewed down the corners as well.


Next I went hunting for more fabric and found some purple and black 'leftover' fabric. I decided to do triangles to make things a bit more interesting. Unfortunately this lends itself to even numbers and since I had 3 cushions, one ended up being stripes.
I arranged the fabric to be triangles on the front and stripes on the back.

 The cushions are a tight fight into the cases, but they are removable. I've used them almost every day since I made them and they are holding up well. I can take the covers off and wash them periodically but the muslin stays. Three cushions for $30 - not too bad!


Thursday, November 27, 2014

Thanksgiving Lasagna

For thanksgiving this year I decided to make myself a low-carb lasagna. I haven't had a chance to eat lasagna in a long time because of the ricotta cheese, but I found a tofutti product which is a dairy and soy free substitution. I took inspiration from the this recipe. Instead of noodles, I used my mandolin to slice zucchini, season with salt and pepper and baked for 5-6 min each side at 425F.

While it baked I began with the filling, I made way more than needed for one dish. I used a package of chopped spinach and half a package of chopped broccoli. Once cooked and drained, I added chopped onion and the pasta sauce to it (I used newman's own tomato basil and marinara sauce) stirred it up, then added protein powder and fiber and stirred again. Last I added a large dash of garlic seasoning stuff I had.


Finally it was time to assemble. Two layers first of the veggie mixture, then a layer of the zucchini, then the tofutti ricotta with goat mozzarella sprinkled on top. Add a bit of salt and pepper to the top and covered with foil.


It was in the oven at 375F for about 40 min then uncovered for another 5-10 min. I wanted to dig in but managed to wait for another 15 min for it to cool down a bit.

If(when) I do this again I think I'll put a thicker layer of zucchini maybe in a basket weave formation and possibly add chopped tomatoes.
 

 I ate the first third before taking the pictures :-p
At about 200 cal per serving I have to say this is the best way to over indulge for the thanksgiving holiday!

Tuesday, April 29, 2014

It has been a while

So no pictures in this post...

I've been doing quite a bit of pottery but that means all the work is outside of my apt and messy so I'm less likely to take pictures and post things.

I have made a ton of things which I will work on cataloging in the next few weeks. Most of it is a mix between Christmas and birthday presents for friends and family.

I have also made several sets of crib sheets for friends who have had kids in the past year. I ended up buying a ton of elastic online for something around $30 shipped which means that for each crib sheet the average cost is around $5-$8 for the cost of fabric and thread and elastic.

I also made a blanket for the most recent friend's baby and hopefully I can find photos of that. It took quite a bit of work to be done before she was born ( I made it by around 3 weeks!)


Saturday, April 13, 2013

pottery all over the place! (pic heavy)

This will be a short picture heavy post. What have I been doing lately? well some of it is what I should be doing (work) the other part is pottery in the pottery studio so there are very few pictures of me crafting anything but I figure I can share the end results most worked well some not so much but here it is!


 This is my Schroder platter I had for my presentation. I used the wooden mold to drop in the clay this took over 6lbs of clay rolled out in a slab to cover it, anything larger than this won't fit in the kiln ... which is good to know I eyeballed the size fairly well. I glazed this with the help of a friend at the studio because I couldn't hold it and glaze at the same time. I then scrapped off the green glaze from the border and sprayed yellow on over it. I really love the way it turned out!


This piece is the middle size of my three four sided molds, I was experimenting and absolutely love how this came out. I will have to use these colors more often. I again used the technique of rubbing off glaze around the rim. I need to experiment with glazing the bottoms of pieces since I don't want too much (and have it get stuck to the shelf) or too little glaze which is what happened on the bottom here.


 This is the smallest of the four sided. I dropped it to create the curve but I like how it didn't become very deep and create a bowl more than a plate. I am experimenting with ways to attach feet to hand built pieces. I used one of the new recycled glazes for this one and really liked how it came out, I also used underglaze to paint what I was hoping would look like bamboo... not quite but I'll keep trying to get better!


 This is my Catalan plate, I used the same technique as the mid sized four sided piece but because this is much larger it didn't give quite the same effect. I'll have to play with it although I do like the colors the numbers don't pop as well here. I also now know I do not like the blue slip under this, which is what the black dots are.  I also ended up cutting the bottom out of this originally so it gave it an interesting shape where I re-attached it. All in all a success.


 This is the smallest of the six sided shapes. The idea I had here was of water pooling into the center, I really liked this although I think next time I will use quite a bit more glaze in the center to make it more pool like. Although I have no idea how this will turn out on white clay which is what I have quite a bit of at the moment.


 This is the medium six sided shape, the lines in the center came from folds in the newspaper I used to hold the clay before placing it in the mold, I think it's interesting how it turned out. I was going for a jeweled look with this one so there is blue slip along the edges which give it a nice texture.


Again the smallest of the six sided shapes. I used blue slip dropped in the middle, the red on the outside I thought I had put quite a bit of it but some how it wasn't nearly enough, I probably should have re-glazed this adding more red since I don't dislike the combination just the amount makes it look like a mistake.


I dipped this in green celedon however the glaze has massive amounts of crawling, I happen to really like the color where it's extremely heavy so I may have to use that in the center of something where it can't fall off, but it's no good to apply it heavy to any side because gravity will take over.


This piece was another experiment where I textured the outside, and I really like how it turned out. The only difference is I would put a foot on this so I could glaze the entire textured area, although I like rocking it back and forth since it's not a flat bottom. The nice thing is it doesn't tip over it's actually fairly stable so the stuff I put in it will stay in it even if it is moving around. I also am going to try this color combination again.

The one thing I do have to say is I have no real room to put all this stuff but I love making it and eating off of it!